Marble-ous Paper to Dye For
I’ve always wanted to try marbling paper, because it looks so pretty. When I saw the samples for the Marbling Workshop at Indianapolis’ Paper Source store, I recruited my friend Wendie to take the class with me. We love Paper Source workshops, and have attended several in the past.
Marbling uses plain paper or any other absorbent material like fabric or wood, to pick up swirled ink designs from a water bath. It dates back to twelfth century Japan, where it is called Suminagashi (“floating ink”).
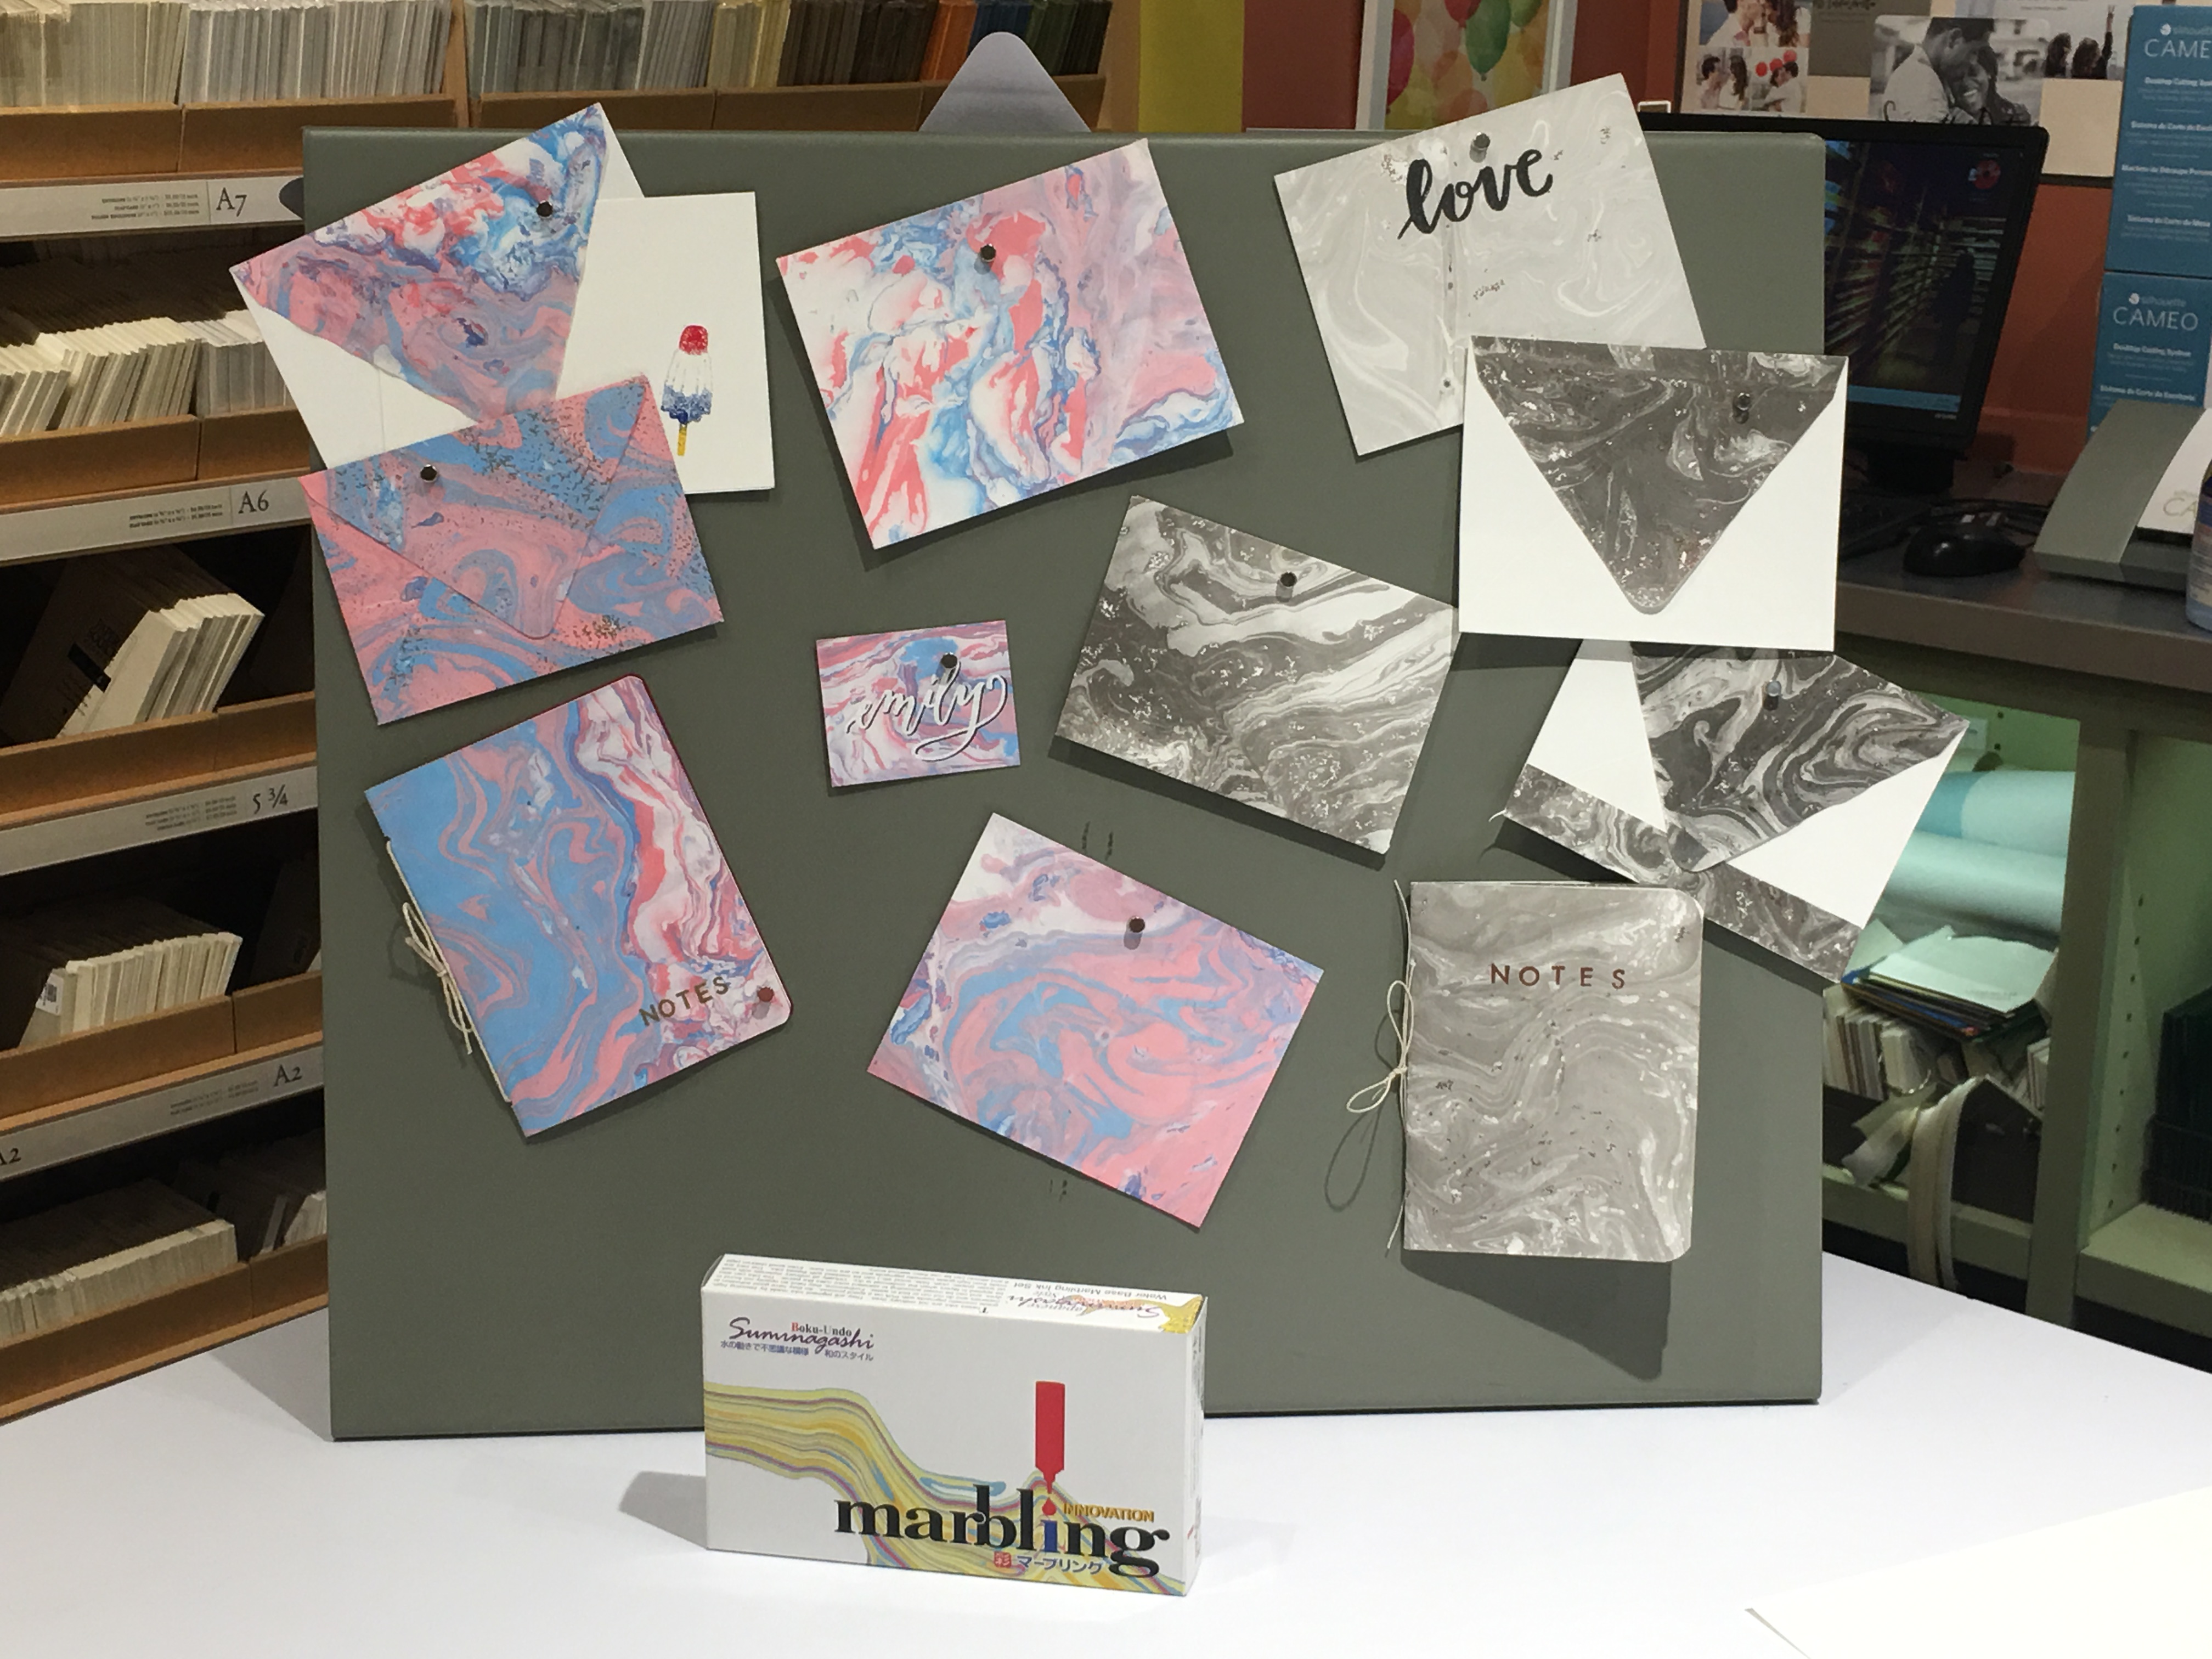
During the class, we created hand-marbled papers in a variety of colors from three different dye baths. One dye bath was used for cool colors (red, yellow and orange), one was used for warm colors (blue and green), and the third was used for black ink. Each dye bath was simply a large aluminum pan filled with water. First, a paper dot that comes with the kit was submerged in water and then allowed to float on the surface. Ink was applied to the bath by dropping a single drop of color on the round paper dot. The dye then spreads out into the water in a circle from the dot. Next you move the dot to another location in the water bath, apply another drop of the same or different color, and repeat one or two more times. The reverse end of a paintbrush was used to move the dot around. Finally, when done adding ink to the water, the same non-brush end of the paintbrush was used to gently swirl the color into patterns. Clear water from the edges of the pan was swirled in towards the center to leave portions of the paper white. Next, the paper you are transferring the marbled pattern to is gently laid face down on top of the water, gently pressing the edges down with your fingertips. Once you lift the paper up from the bath you will see the marbled pattern, and you can set the paper marbled side up on a flat surface to dry. You can accelerate the drying process by blotting the paper with a paper towel to soak up excess water or using a heat gun to dry the paper. The dye baths can be used over and over for multiple sheets of paper, but after awhile, the water does get muddy so you’ll want to empty the pan and add fresh water.

The colors are lighter when transferred to paper than they appear in the ink bottle. Black makes a grey pattern, red is more of a pinkish color, etc. Paper Source sells the marbling kit we used in class, which includes six dropper bottles of ink and the paper dots. The dots can be reused during your marbling session and the ink goes a long way since you are just using a few drops of it at a time.


We marbled envelopes, note cards, and paper in two different weights. From the heavier weight paper we made a pamphlet journal. The marbled paper was used for the cover and plain paper was used for the inner pages. We punched three holes in the cover and paper and then bound them together with string:


I used my leftover paper to create notecards and tags:


I often buy patterned paper with a marbled design for craft projects, and have considered buying stamps that create a marbled look, but now after learning how to actually marble paper, I’d like to incorporate more real marbled paper into my craft projects. The whole marbling process was a lot faster and easier than I expected.


Related Posts

Sending off Summer with a Craft-Filled Summer Camp Recap
Hello Gnomies! It’s been awhile since my last post, but I’m…
13 May, 2018
Fit to be Dyed: Easter Egg Decorating Fun at Home
Decorating Easter eggs turned out to be the perfect stay-at-home Easter activity for…
13 May, 2018
Leave A Comment