
Basket Case: Designing a Command Center to Conquer Clutter
A few weeks ago I decided I needed a system to tame all my purchases, paper piles, and other assorted items I drag home and unceremoniously dump on the floor before I put them away – often much later. I also needed a way to handle my incoming mail in an efficient way. I started browsing online for inspiration and learned what I was in search of was a command center. I ran across this photo which sparked the whole idea to create a command center of my own, since I had a similar amount of space available along one wall in my living room – a high traffic area close to both my front door and my door leading to the garage, that attracts incoming clutter on the floor. I’d also been looking to cover up the ugly cable and vent along this wall with some furniture. My main objective was to set up a center that was easy and inexpensive to design, pretty with no exposed paper showing, and had a LOT of storage space to conceal items.
I started searching for inexpensive furniture ideas which led to Googling a variety of secretary desks and console tables. When a search result popped up for this console table from Kohl’s, I immediately knew it was what I wanted. The design and hazelnut color option were a close enough match to my coffee table and end table, and the baskets looked like a perfect way to hide the clutter. The lower shelf and console top afforded additional room to hold baskets and boxes to corral papers. The price was ideal – after the sale price and 30% off coupon, it was only $113 with free shipping – plus I earned Kohl’s cash back, making it less than $100! I read a large sample of the reviews (most were extremely favorable) and previewed the assembly instructions (looked easy!) before ordering, because I HATE assembling furniture and am terrified of anything too complicated – or that involves power tools. Reading people’s reviews were extremely helpful in convincing me I could put this together on my own in one evening. Words like “45 minutes” and “only one person needed” jumped out at me and convinced me to press Add to Cart.
I assembled the table the day it arrived, because I was excited about setting up my command center. The assembly process was EXTREMELY easy. The instructions are easy to understand and only eight steps long. The table arrives in five pieces, the baskets in six parts, and the hardware consists of just twelve bolts (plus a spare), six wood dowels (plus a spare), and an Allen wrench. There is also an optional wall anchoring kit included I didn’t use since the furniture is already so sturdy and stable. It did take me two hours from start (unpacking) to finish (clean up) to assemble it, which included a few breaks to document the assembly process, get drinks and check my phone. I’d estimate I spent 45 minutes total on actual assembly; 45 minutes on unpacking and sorting the box contents, sorting the packaging material into trash and recycling, reading the instructions and dusting all the tiny Styrofoam packing bits off the shelves; and 30 minutes tightening the bolts with the Allen wrench. The easiest assembly step was putting together the baskets. It only took five minutes total to unwrap and pull open the baskets, insert the bottoms, and add them all to the top shelf. For the price, I was impressed with the quality of the console table. The top especially is really gorgeous and the wood is very heavy. I did find some imperfections in the wood finish; the baskets are not super durable; and one corner of the top piece was nicked a bit probably during shipping. Overall my impressions are extremely favorable and similar to the reviews I read, and I’m glad I bought this table.

Once the table was together, I noted the bottom shelf’s height and depth in inches then headed to The Container Store to check out some boxes I saw online. I got three file boxes for the bottom shelf that were tall enough to hide the ugly cable on the wall behind them, and two document boxes and two handwoven small round baskets for the top. Next I added some fall décor accents and an owl shaped hamper to hold larger items I bring home, plus all the plastic bags I reuse and accumulate for store recycling.


I wish I could say at this point I jumped right in to setting up the filing systems for my command center but at this point I let everything sit for several days while I got sidetracked by thinking about how I should decorate the wall above it. I wanted to make a sort of gallery wall area but had never put one together before. I browsed some inspiration online, but didn’t find anything that sparked ideas. I tossed a few pictures on the floor in front of the command center to think about a layout later and got busy with other things. Over the next several days, I accumulated other possible items for my gallery wall, including a large white frame I’d received as a birthday gift a few years ago that holds sixteen 4X4 photos, and framed photos of my friend’s daughters I got for Christmas last year. I decided to make my wall a fall theme because it’s easier for me to work around a theme, even though I’ll have to switch it up when the season is over. I used my Kohl’s cash from buying the console table to get some frames during Kohl’s lowest prices of the season sale. Because the frames were such a good sale price and I had so much Kohl’s cash, I ended up getting one 4 X 6, one 5 X 7, and two 8 X 10 frames for free.

Putting up my gallery wall took longer than assembling the console table! It took 3 hours and 45 minutes, which is why I put it off for so long to begin with. First I measured the width of the console table and the height of the area above it that I wanted to fill. I marked off these dimensions on my floor and arranged the frames until I found a layout I was happy with. (Later, when I put the frames on the wall, I ended up making a few adjustments to the layout.) Next I took apart all the frames, cleaned the glass with Windex wipes, and let them dry in a sunny window before adding the photos. I bought the prints and enlargements during Walgreens half price photo sale so I was able to get a really good price on pictures. For the big white frame, I scrolled through my Instagram and found sixteen of my favorite fall photos to print. The leaf and acorn wood accents are from the Target dollar spot. The Gnome Décor sign was custom-made by Maggie Made It and I absolutely love it! It’s for my eventual craft room, but too pretty not to enjoy now! I made the fox paper art during a workshop at Paper Source, and the three fall wood framed accents are from Meijer. Everything was hung using a Command picture hanging kit so there are zero nails! I’m a huge fan of Command products because they don’t leave marks or holes on your walls. They take time to initially apply, seal, and press together, but are totally worth it. You can also remove the frames, switch out the photos and put them right back up since the wall strips and frame strips Velcro together, without having to use up new strips. I didn’t measure or use a level on the pictures as I hung them. I just eyeballed everything. It’s not perfect, but I am happy with how it turned out.


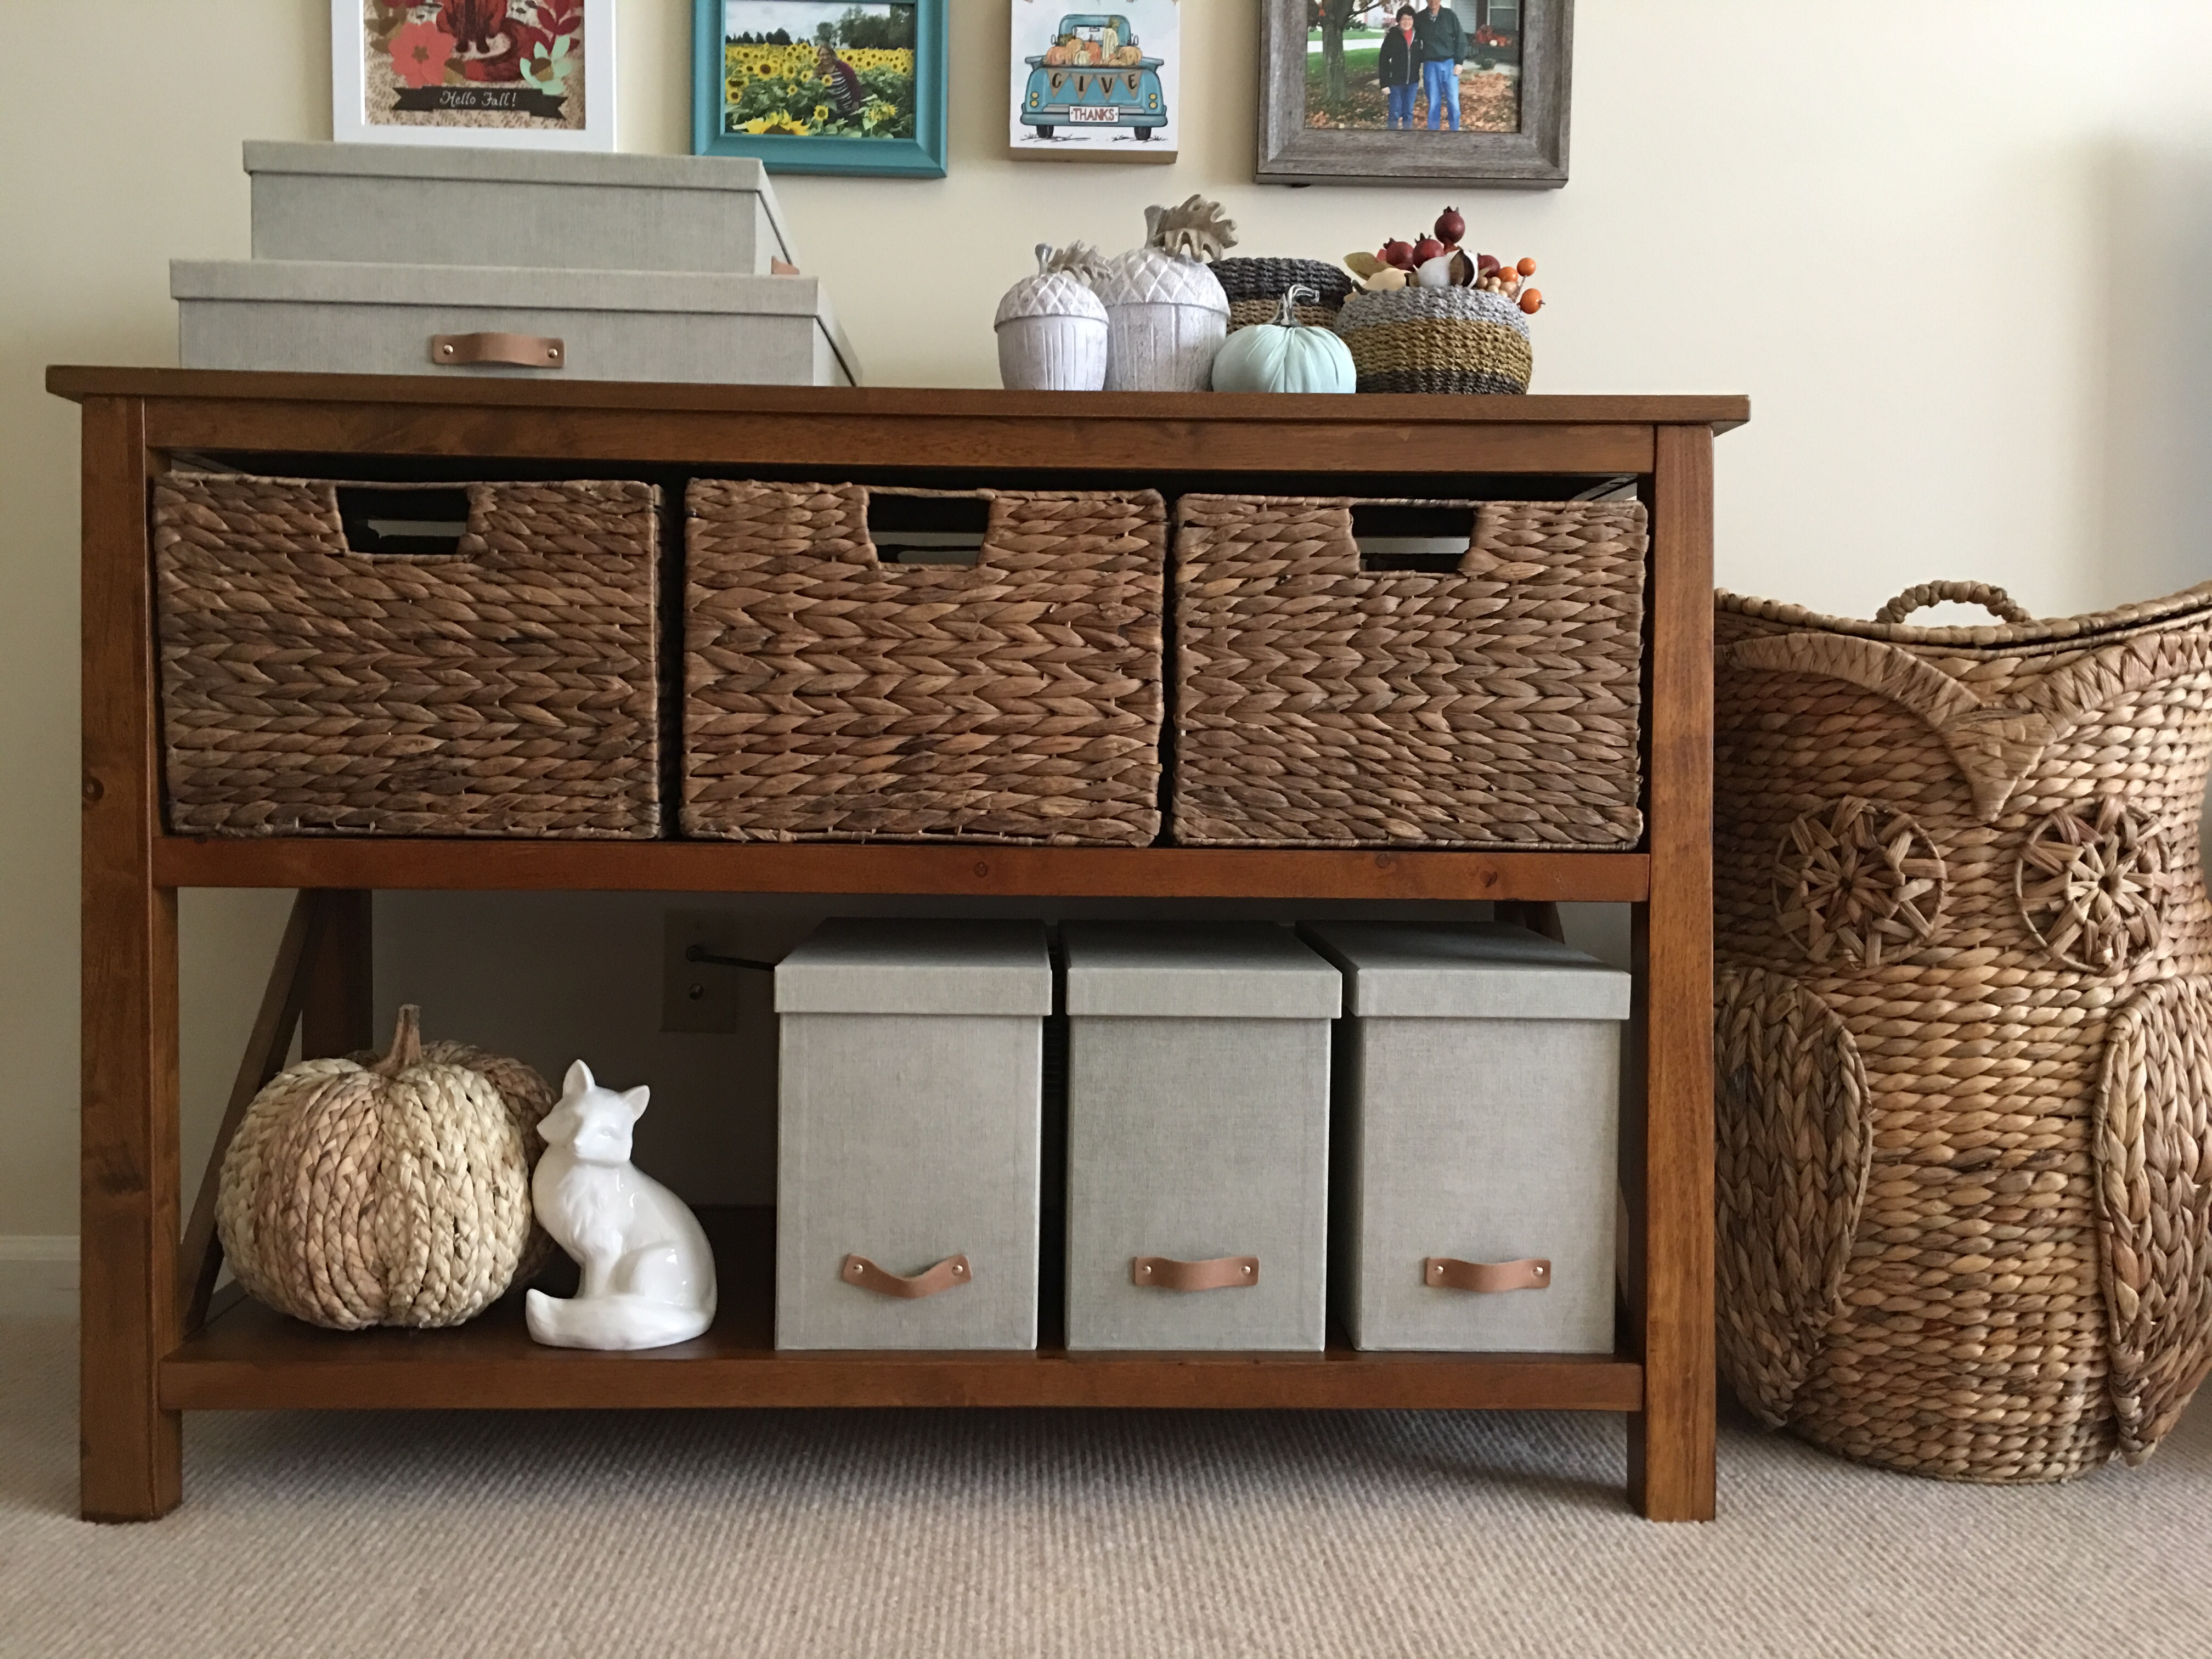
I’ve labeled the photo below so you can see how I set up the filing system for my command center. This was the quickest step! It took me about 10 minutes to decide which baskets and boxes would work best for incoming mail. The small box on top of the command center is used to store coupons for stores and restaurants. (Grocery coupons go in my wallet in a divided section labeled coupons.) The large box under it holds bills that are due and other high priority things I need to do. The small round lidded basket holds store receipts I need to save. As mentioned earlier, the large owl basket to the right of the console table is used to hold empty plastic bags I reuse or return to the store for recycling, since curbside pickup doesn’t take plastic bags. On top of the bags there is plenty of extra room to contain packages or purchases I bring home if I don’t have time to put them away.
The baskets in the middle of the console table are larger than they appear. I was surprised how much they hold! They are each 12″ wide X 16″ deep X 9″ high. The basket on the left is a spot to dump incoming mail if I don’t have time to process it immediately. Ideally, I go through my mail the minute it hits the door and bypass this basket altogether. But realistically that doesn’t always happen, so this basket is for mail I still need to go through. The middle basket is for mail and papers I am keeping, but still need to be filed. The basket on the right side is for online purchases I’ve gotten in the mail and have opened, but haven’t put away yet. On the bottom shelf are three file boxes which hold hanging files: To Do (low priority), To Read, and Filed (by category such as Insurance, Utilities, Greeting Cards, etc.). I also have a large lidded basket for catalogs and magazines I keep in a corner of my living room by the couch. My goal is to go through each basket or box at least once per week and toss anything I no longer need. I’ve been using this filing system for a couple weeks now and it’s been going well. I’m happy to report I received a lot of junk mail during this time that could go straight into my recycling bin without ever touching a basket, so I’ve barely made a dent in all this new storage capacity!


Below is a photo of what my “production line” looks like when I’m in the middle of tackling a whole week’s worth of mail at once. This past week I was so busy I didn’t keep up with the mail on a daily basis, so I was able to put my new command center to the test with a large volume of mail while I watched the news last night. (How handy that my command center is right next to my TV!) It really went so much faster to sort everything than before I set up this system, when I would just make ambiguous stacks of paper and nothing was ever filed. I found myself saving less stuff and sending more to recycling (look how full that blue bin is!), if I thought it didn’t fit into one of my new sort categories. I also kept a trash can nearby for packaging that couldn’t be recycled.

I’m curious to see if this new system stands the test of time or needs some adjustments made to it. I’ll keep you posted! How do you organize all of your incoming mail and papers? Do you have a filing system, or a piling system?


Marilee | 7th Oct 19
Wow! That is so nice, Denise. I need a command clutter center. Love how you accented it with decor and the photo collage on the wall. Nicely done!
Carrie K | 7th Oct 19
Your command center turned out so practical AND beautiful, Denise! I love the gallery wall and all your boxes, baskets, and decor work together seamlessly. Pure perfection!
Karen Mackay Gomez | 8th Oct 19
Love this Denise! So pretty and I love that you infused nature into the design with the baskets, ceramics and pictures! I need to do this ASAP!