Modern Romance: Soft Sage and Rose Gold Cards for A Bride-to-Be’s Wedding Party
Lately I’ve been working on several custom orders, which I love to do because they stretch my creativity and give me an opportunity to work on projects I might not otherwise make. I love a challenge! The first of this latest round of custom order requests was a couple months ago. Ashley contacted me about designing personalized cards to give to her friends she was going to ask to be bridesmaids in her upcoming wedding. I wasn’t sure where to start with design options, so I did what I always do in that situation: Google. I discovered an absolutely lovely color-layering Bride-to-Be stamp set by Altenew that has a matching die set available too. (Although it’s wedding-centric the floral elements can be used for all kinds of other cards too.) I asked Ashley if she preferred a certain color scheme or had wedding colors in mind yet, and she thought rose gold and sage green would be a great color palette for the cards. I was thrilled with this choice as both are among my favorite colors! I looked through my ink pads to see if I had the right colors needed to create a rose gold and sage card. Because this is a color-layering set, I found I could get the rose gold effect by layering a few different pinks and peaches with rosy tones. My friend Wendie had given me a Gina K. Peach Bellini ink pad and a Ranger Distress Oxide Bundled Sage ink pad and I found these colors were perfect for the cards. I use mostly dye inks when I stamp since they dry quickly and distribute vivid color evenly, but my Delicata rose gold pigment ink pad was perfect for layering the centers of the floral clusters with a beautiful metallic rose gold. When I look at my final cards, it looks like I only used a few ink colors, when in fact I used a total of ten different ink colors, shown in this photo.

For custom orders, I like to make the first card to see if my design will turn out like I envision it and run it by the customer before going any further. Then I try to make the rest of the cards in an assembly line fashion, which is a new method of crafting for me, because I’m used to just making one design of something and then moving on to something new and exciting. Making custom orders has taught me to be more efficient with my time and I’m learning how to better “batch craft.”

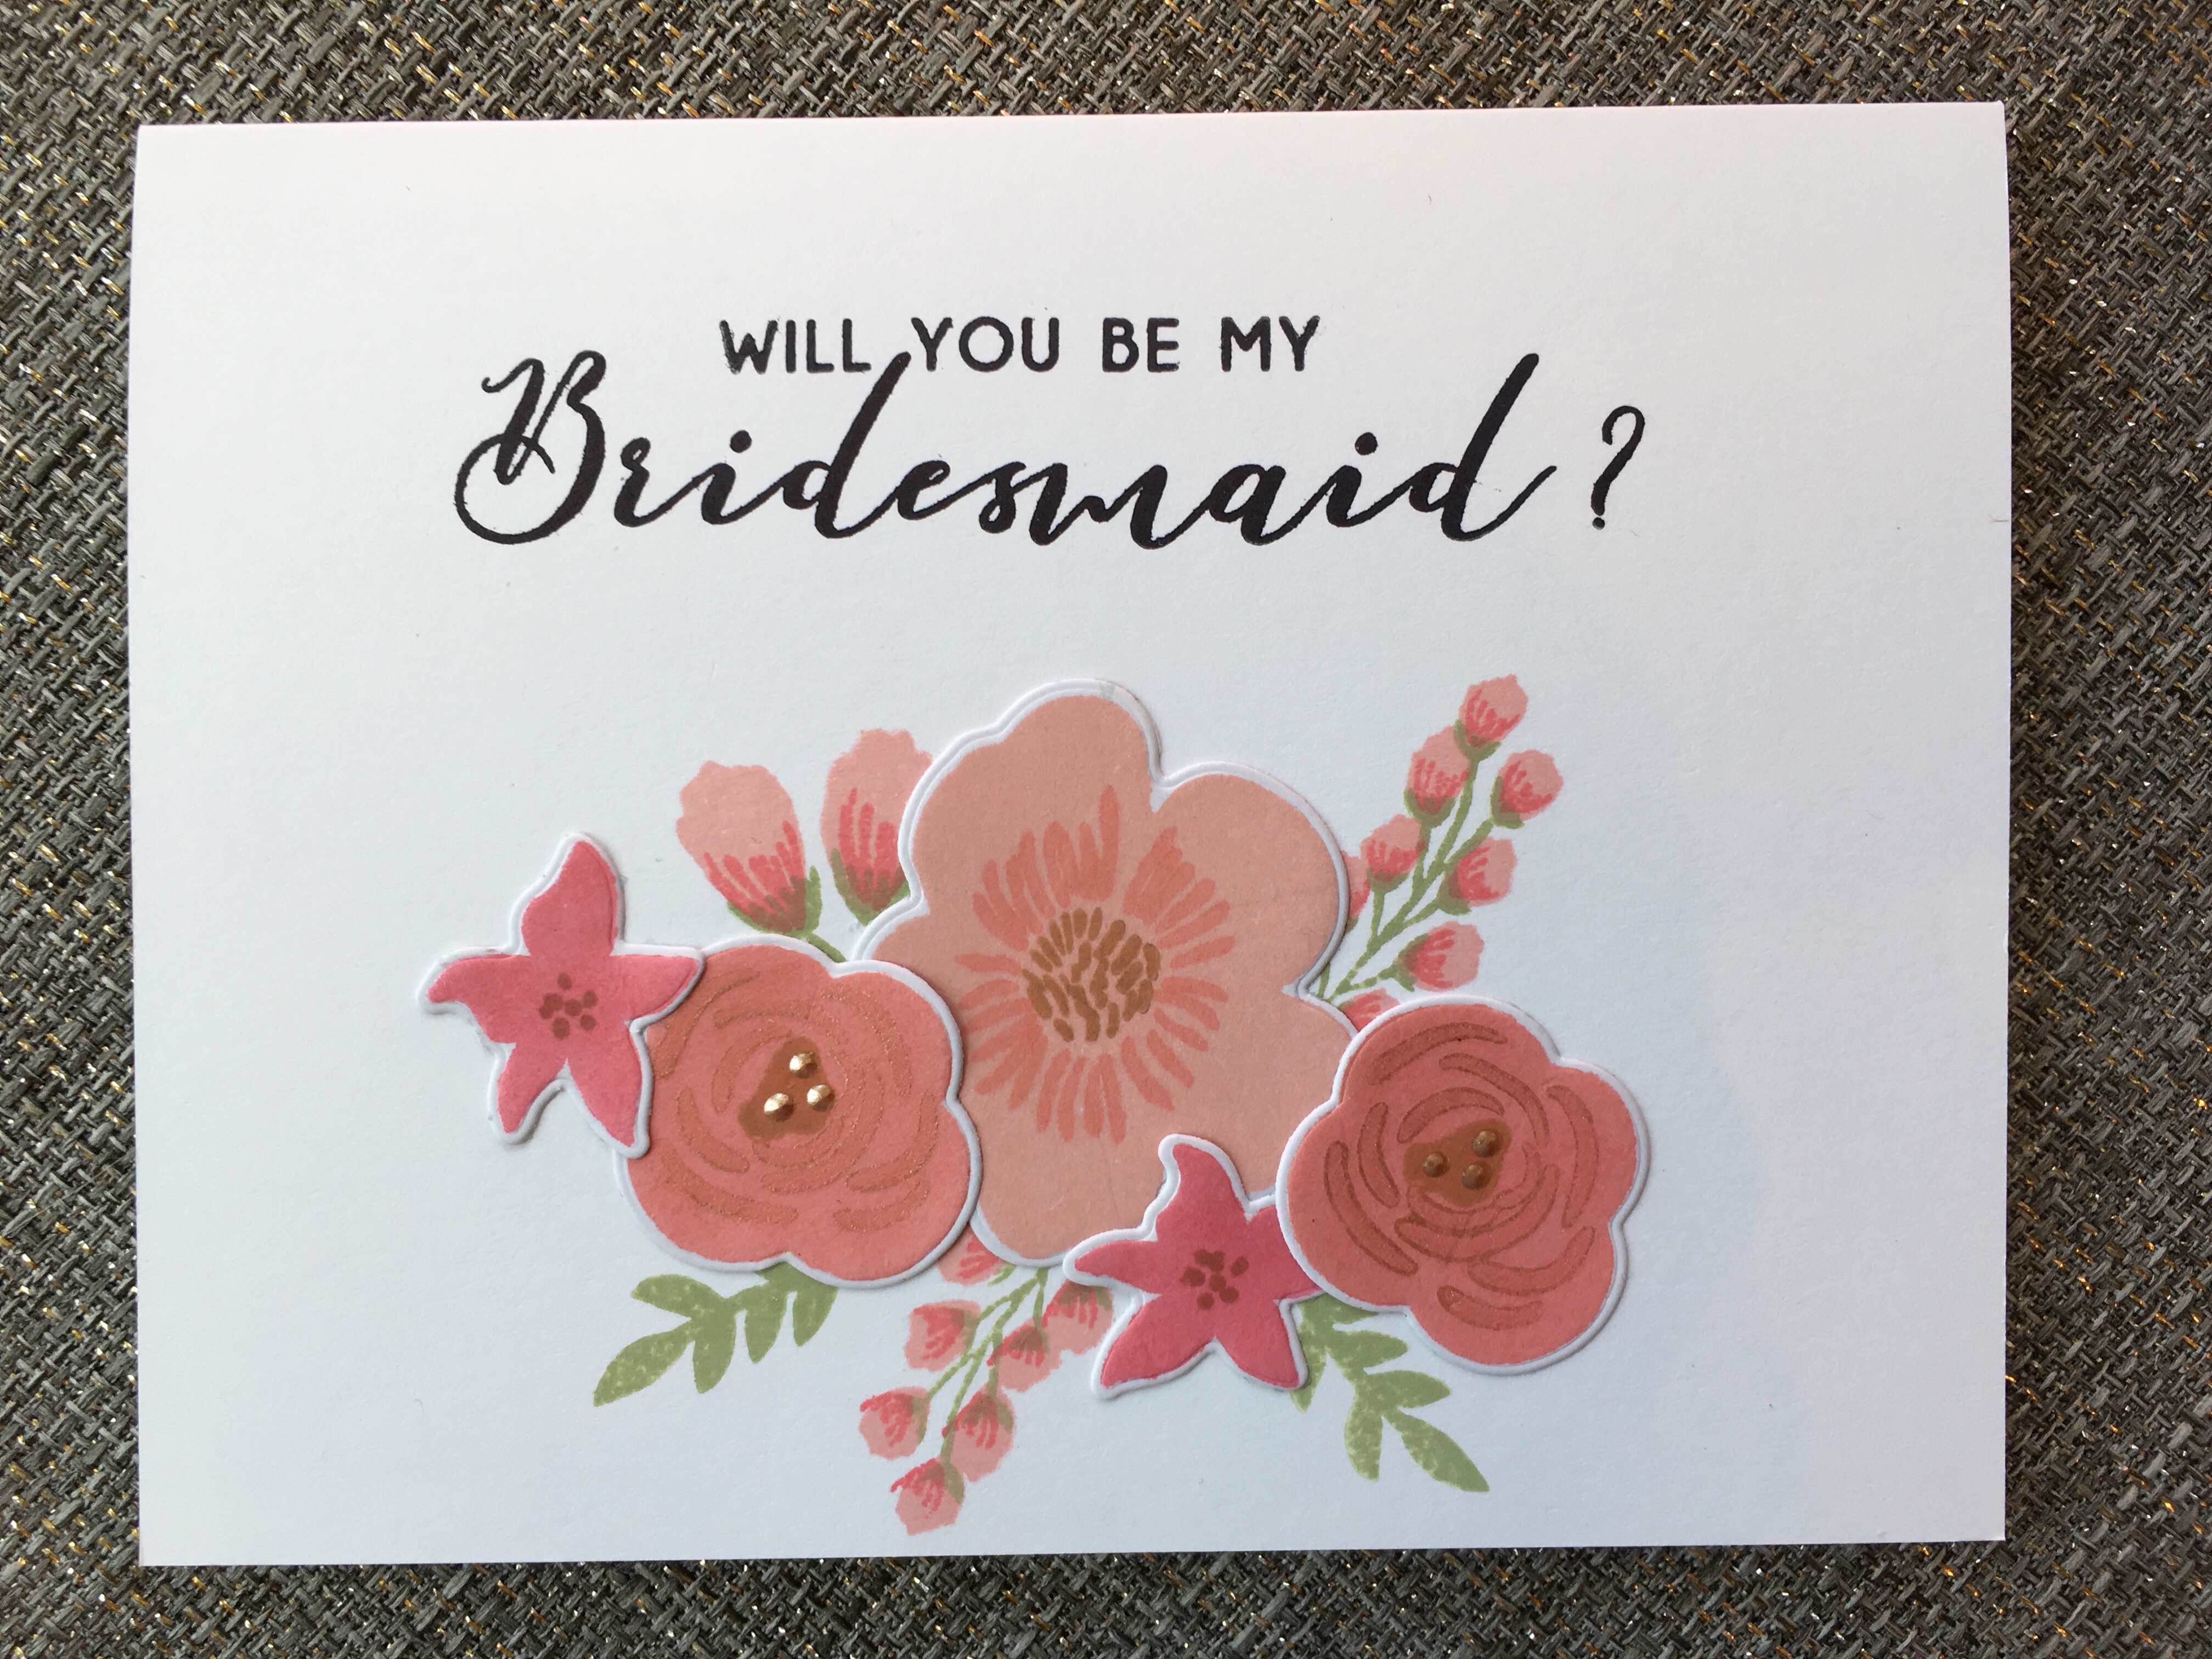
My first step was to stamp the sentiment, then the background flowers that go directly on the card front. While the stamp set included Bridesmaid and Maid of Honor text options, Matron of Honor was not included so I had to get a little creative with that card. I stamped the “of Honor” part of the Maid of Honor stamp, then used other parts of the stamp, being careful to apply ink just to certain letters like Ma, r, and on. I used a black pen and part of the d to create the t. It was pretty tricky to do and didn’t turn out perfectly, but I think it looks ok.

The placement of the background flowers was a little tricky too, because I didn’t measure the placement of them. (I rarely use a ruler when crafting unless I absolutely have to, and I have yet to buy a stamp positioner tool for consistently stamping multiple images, which I really need to do.) So if you look closely at all the cards grouped together, you will see some variation in where the flowers were stamped, and in turn where the die cut flowers were layered over them. I kind of like the subtle differences.


Next I stamped the flowers that would be die cut later and layered on the card front. Most of the flowers are made up of three separate stamps each, and thus three different ink colors. The small starfish-shaped flowers are made using two stamps. After die cutting the stamped images, I glued them onto the card fronts. The assembly and adding any final touches are always my favorite parts of cardmaking! A day after making the first card, I realized rose gold liquid pearls would look nice to further enhance the centers of the four-petal flowers. They go on as liquid drops that dry into a pearl accent look.


To further personalize the card presentation, I hand stamped the envelopes with each bridesmaid’s name and used flower stamps to coordinate with the cards. The names on the envelopes look hand lettered, but each letter is actually an individual stamp from the Penned Elegance Alphabet stamp set by Papertrey Ink. All of the lowercase letters can be connected to one another and some letters have multiple options with different connectors so you can choose the right letter to connect to the previous letter. So clever and well designed! I found stamping the names to be really fun. I could do that endlessly!

Ashley presented the cards to her bridal party with adorable gift boxed champagne bottles she hand glittered and rose gold stemless stainless steel wine glasses. So perfect! I love that she took photos of her friends opening their cards! Congratulations, Ashley! Your wedding is going to be fabulous!


Related Posts

A Giveaway to Celebrate Two Years of Gnome Decor!
October 5 UPDATE! We have a winner! Katie Camden won the set of three handmade…
27 February, 2019
A Giveaway to Celebrate One Year of Gnome Decor!
October 6 UPDATE! We have a winner! Rebekah Khoury won the set of three handmade…
27 February, 2019
Marilee | 28th Feb 19
The cards are lovely you made for the bridal party special order! All your cards are so special with much detail. They are one of a kind treasures and the receiptants should be so lucky to own them.
Carrie K | 5th Mar 19
You did a fabulous job on these cards, Denise!