Gnome Sweet Gnome: Making a Magical Miniature Garden at Caravan Classes with Strawtown Garden Gals
Here in central Indiana we’ve had such a wintry spring! It’s mid-April. Why are we still getting snow? I didn’t even bother planting pansies this year. I think I can count the warm weather days we’ve had on one hand, plus low temperatures are often still dipping below the freezing mark. At this point I’ll just wait to plant flowers after Mother’s Day, which is usually the all-clear signal to have a go at planting summer annuals. I wonder if it will even be warm enough for that a month from now? Everything seems to be blooming later than it has in recent years.
If you’ve been reading my blog for awhile, you may have seen my other posts about past events I’ve attended at Caravan Classes, my favorite art studio run by my sweet friends, local artists Erin Goodman and Deanna Leonard. They offer all sorts of art classes, parties, events and custom activities for people of all ages. They even have a mobile art studio, a vintage Shasta camper that has been renovated into an art studio on wheels perfect for festivals and kids’ birthday parties.
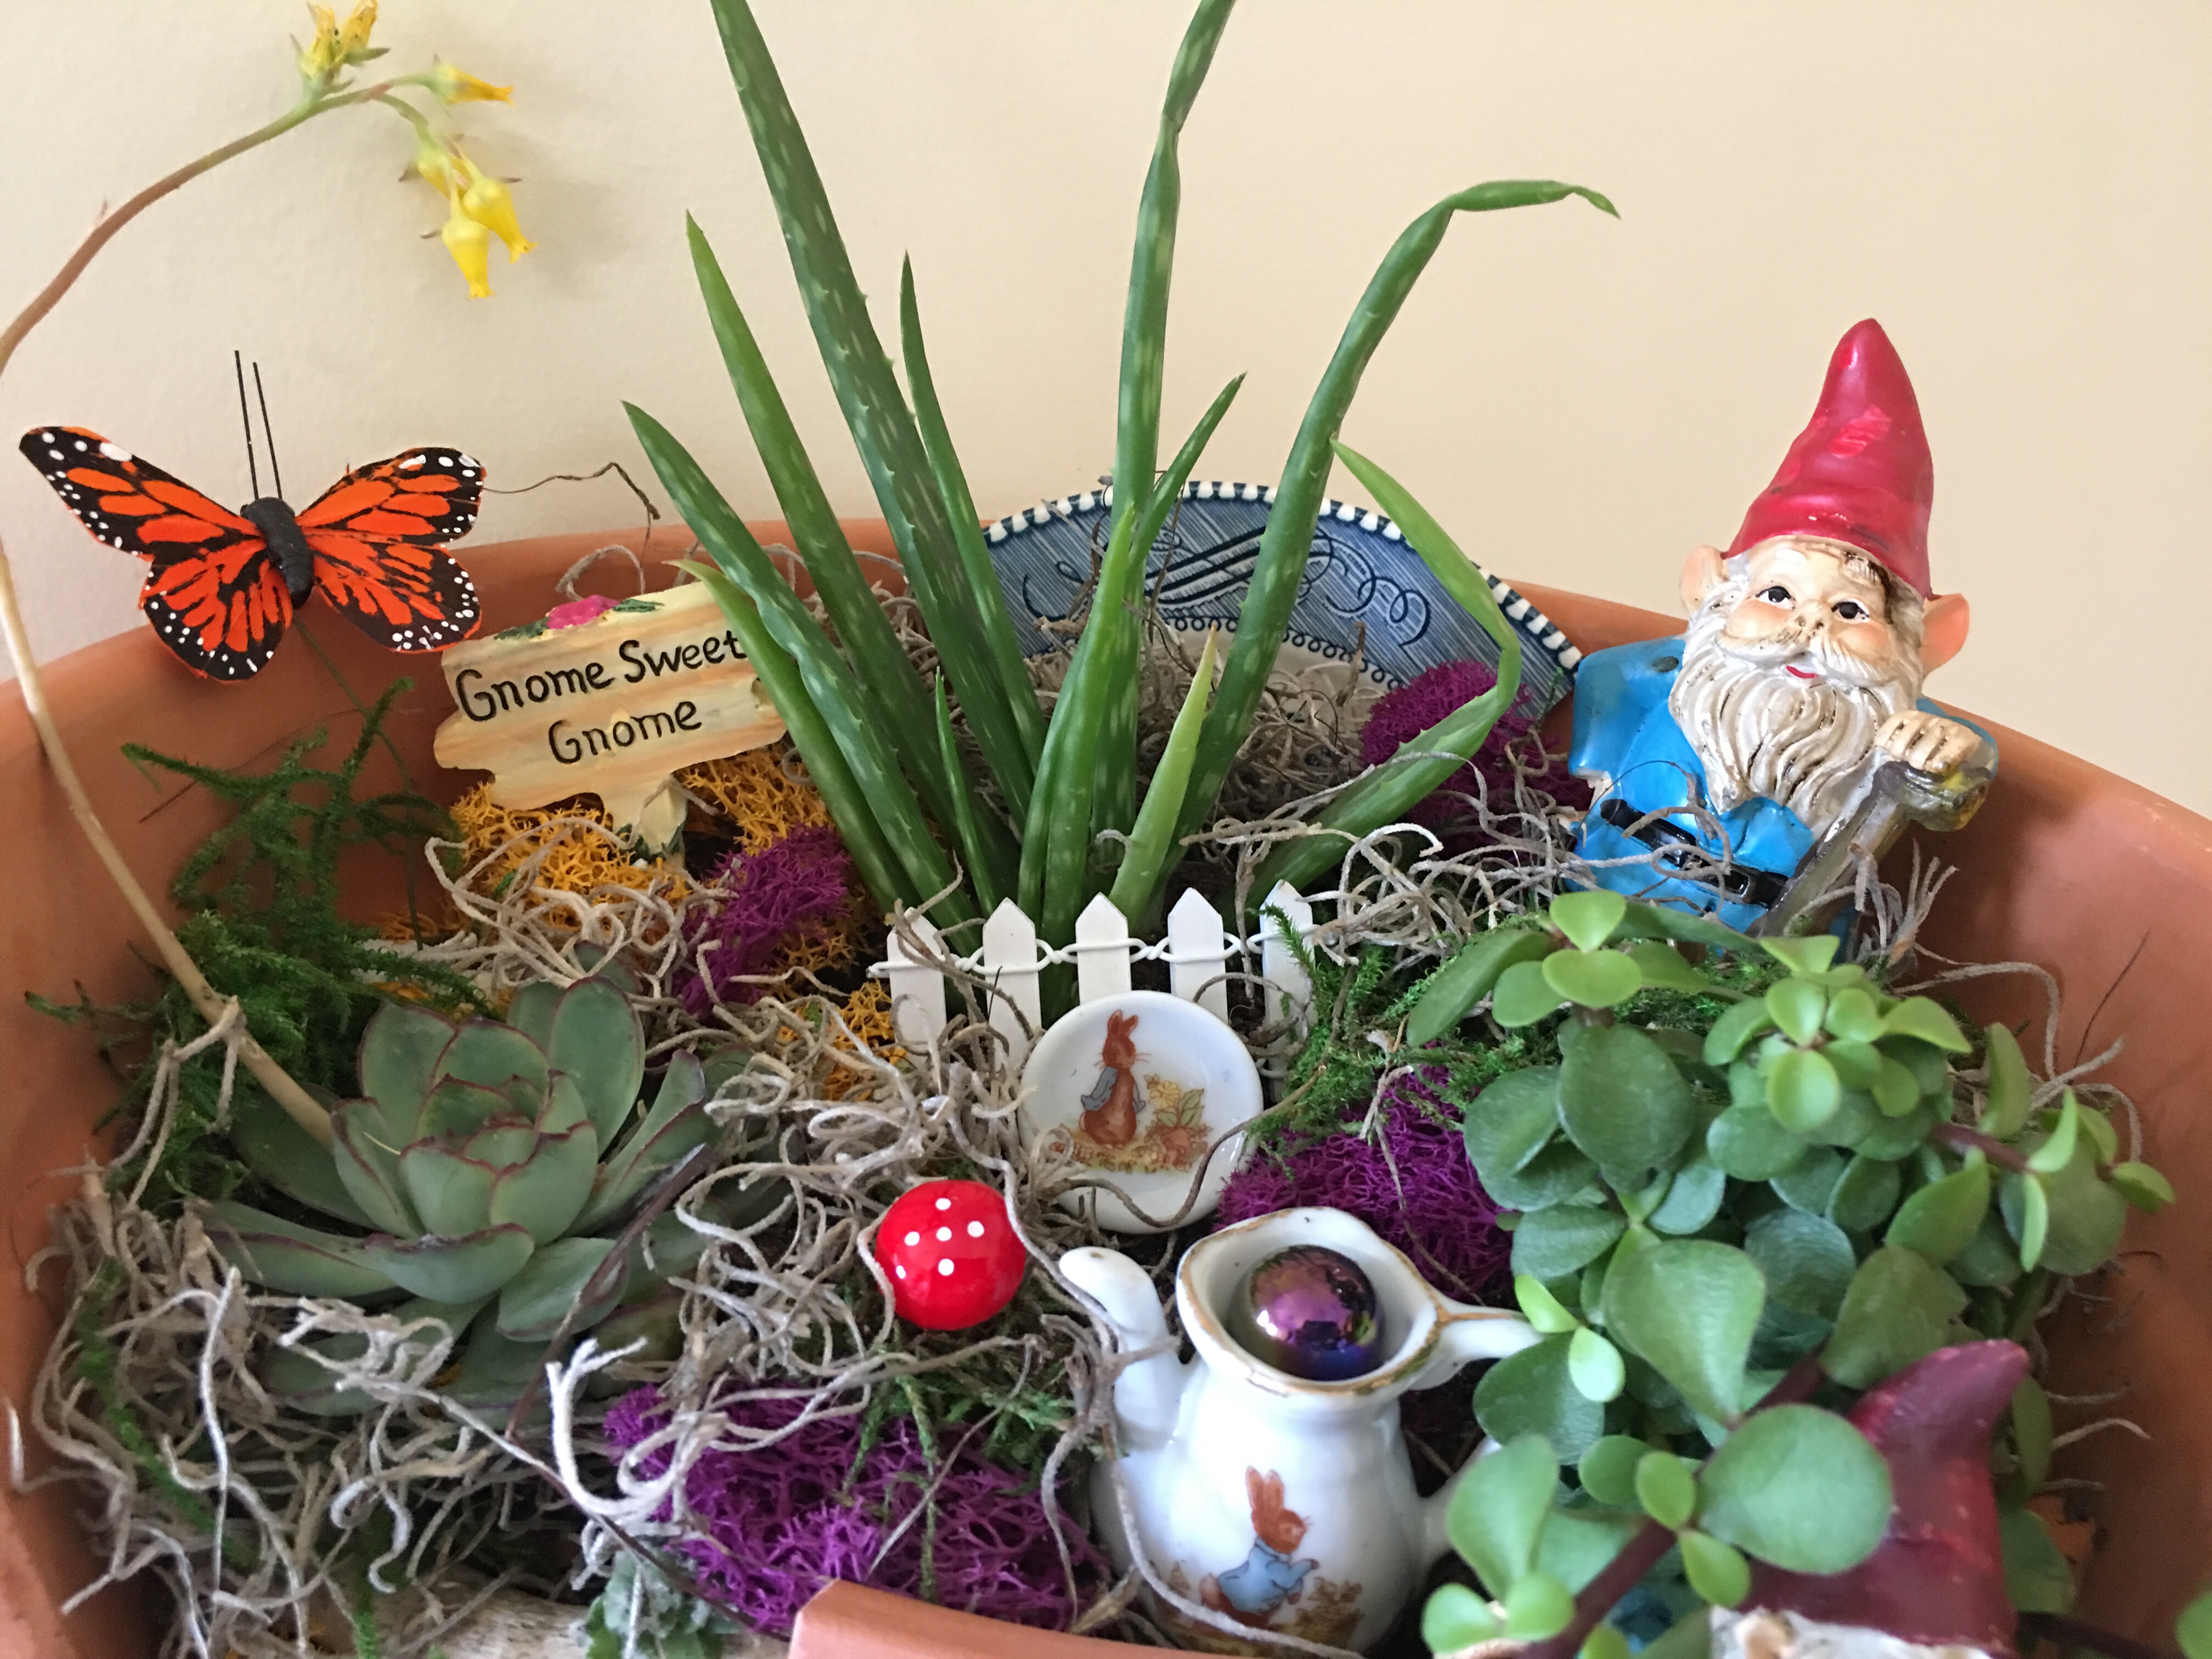
Caravan Classes also offers classes taught by guest artists and teachers. A year ago I saw photos from their Succulent Fairy Garden Workshop taught by Tina Clark of Strawtown Garden Gals, and I knew this year I had to attend her class when a similar workshop was offered! Last year’s class used vintage containers and gourds for fairy homes. This year, terracotta pots were offered which Tina cut to add a neat vertical landscaping effect. I’ve never made a fairy garden like this, so I was really excited to try this new look! The Terracotta and Succulent Fairy Garden Workshop was offered April 3 and 5. We attended the first night.
Each class attendee received a pot, gnome that hangs on the side of the pot, four different colors of moss, soil, ceramic mushroom, two adhesive ladybugs, rocks, our choice of eclectic accents like mosaic tiles, broken pottery, scrabble letters, wood, natural elements, & tiny baskets, and our choice of two plants from a huge variety of succulents. We were also able to buy an additional plant and extra “fancy elements” to add to our garden like gnomes, fairies, butterflies and little tea cups for next to nothing. I bought a ton of extras for a total of $6!


The bits and bobs bar was so much fun to “shop from” for free items to add to our fairy gardens. We were each given aluminum pans to collect our treasures in.
With everything ready for us, building our fairy gardens was quick and easy peasy. A lot more fun than at home, where I have to first find and buy the plants at various garden stores, find my fairy garden figures plus shop for and add new ones, find rocks, buy the potting soil, clean out my flower pots, drag everything to the back yard to plant…


The sky was the limit in terms of creativity and everyone in the sold-out class made the most adorable fairy gardens! Deanna demonstrated how to distress the pots with paint. Mom and I left our flower pots plain but painted wood letter initials (M and D) blue for our gardens. Tina showed us tips on planting our gardens and explained how to best care for succulents. It’s essential not to overwater them. She recommended keeping our gardens inside – at least until low temperatures don’t dip below 50 at night – and watering them every week and a half with only 2 tablespoons of rain water per plant! (Succulents don’t love tap water.) We’ve had lots of rain and snow lately, so collecting fresh rain water has been easy lately. I set a pie plate outside to catch the rain and have already collected four measuring cups full of water!


There was a glue gun available to secure anything we wanted to fix permanently into our garden. I used it to glue the purple ceramic face and clear round glass piece to the side of my pot, and to nestle the teacup in at the bottom of the pot so that it wouldn’t fall out. Mom didn’t use glue at all. We added a sand/soil mix to our pots and then covered the soil with Spanish moss and colored moss. We put broken pieces of blue and white plates in our fairy gardens, and for my “stair steps” I used wood rounds. Voila! My first fairy garden of the year is done!


Class attendees were encouraged to enter their fairy gardens in the Welcome to Fairyville event taking place in Noblesville this week. I’m hoping to attend Friday evening’s Fairy Trail of miniature houses. We had so much fun seeing the fairy homes and voting on our favorites last year! Learn more about the event here!


Related Posts

Gnomaste: A Miniature Yoga Garden
Today we are celebrating six years of Gnome Decor with a relaxing yoga session in…
18 April, 2018
Welcome to Oktoberfest in the Gnome Garden
Hallo Oktober! My gnomes are celebrating Oktoberfest in their little garden this fall! Often my…
18 April, 2018
Marilee | 19th Apr 18
I ❤️Our gnome gardens! The workshop was so fun and the succulent plants are such nice quality. I have enjoyed my gnome garden so much! 🍄
Wendie | 25th Apr 18
Such adorable gnome gardens, Denise and Marilee! It looks like you had a lot of fun! The succulents are so pretty!