Classic & Contemporary Christmas Cards
This past weekend was warm and rainy, the kind of weather that fools you into thinking Christmas is much further away than it actually is. Some of my perennials are confused and are starting to show signs of Spring growth from the mild temperatures and rainy days. We’ve had frost but not a hard frost so my fall fairy gardens are still going strong too. But there are only – GET THIS – 50 days until Christmas. Gulp. So when my CFF (craft friend forever) Wendie invited me over for a Saturday crafternoon, I was determined to focus on making Christmas cards. Both of us have lost our crafting mojo lately, so this was a perfect opportunity to get it back. I felt out of practice, making several stamping mistakes and trying to melt glitter instead of embossing powder with the heat gun – even after a practice run. But I think I may have hit my stride finally, because now I want to MAKE ALL THE THINGS. It will be a race against time to see if I can check off my ambitious Christmas crafting to do list by December 25.
I’m also finally in the Christmas shopping mood, as my mom and I hit a total of five holiday open houses between Friday night and Sunday. So I’m making good progress on my Christmas shopping, and it was indeed a fun weekend as I got to spend it with two of my favorite people on two of my favorite activities: crafting and shopping.
Crafting with Wendie is always fun, and Saturday was no exception. She made the most delicious pumpkin chocolate chip cookies, and of course we hit our favorite craft break dinner spot, Cancun, for Mexican food and more importantly, margaritas. In between eating and playing with her four lovable pets who all clamor into her craft room for attention, I managed to finish a few Christmas cards with a classic and contemporary feel to them.

The Most Famous Reindeer of All
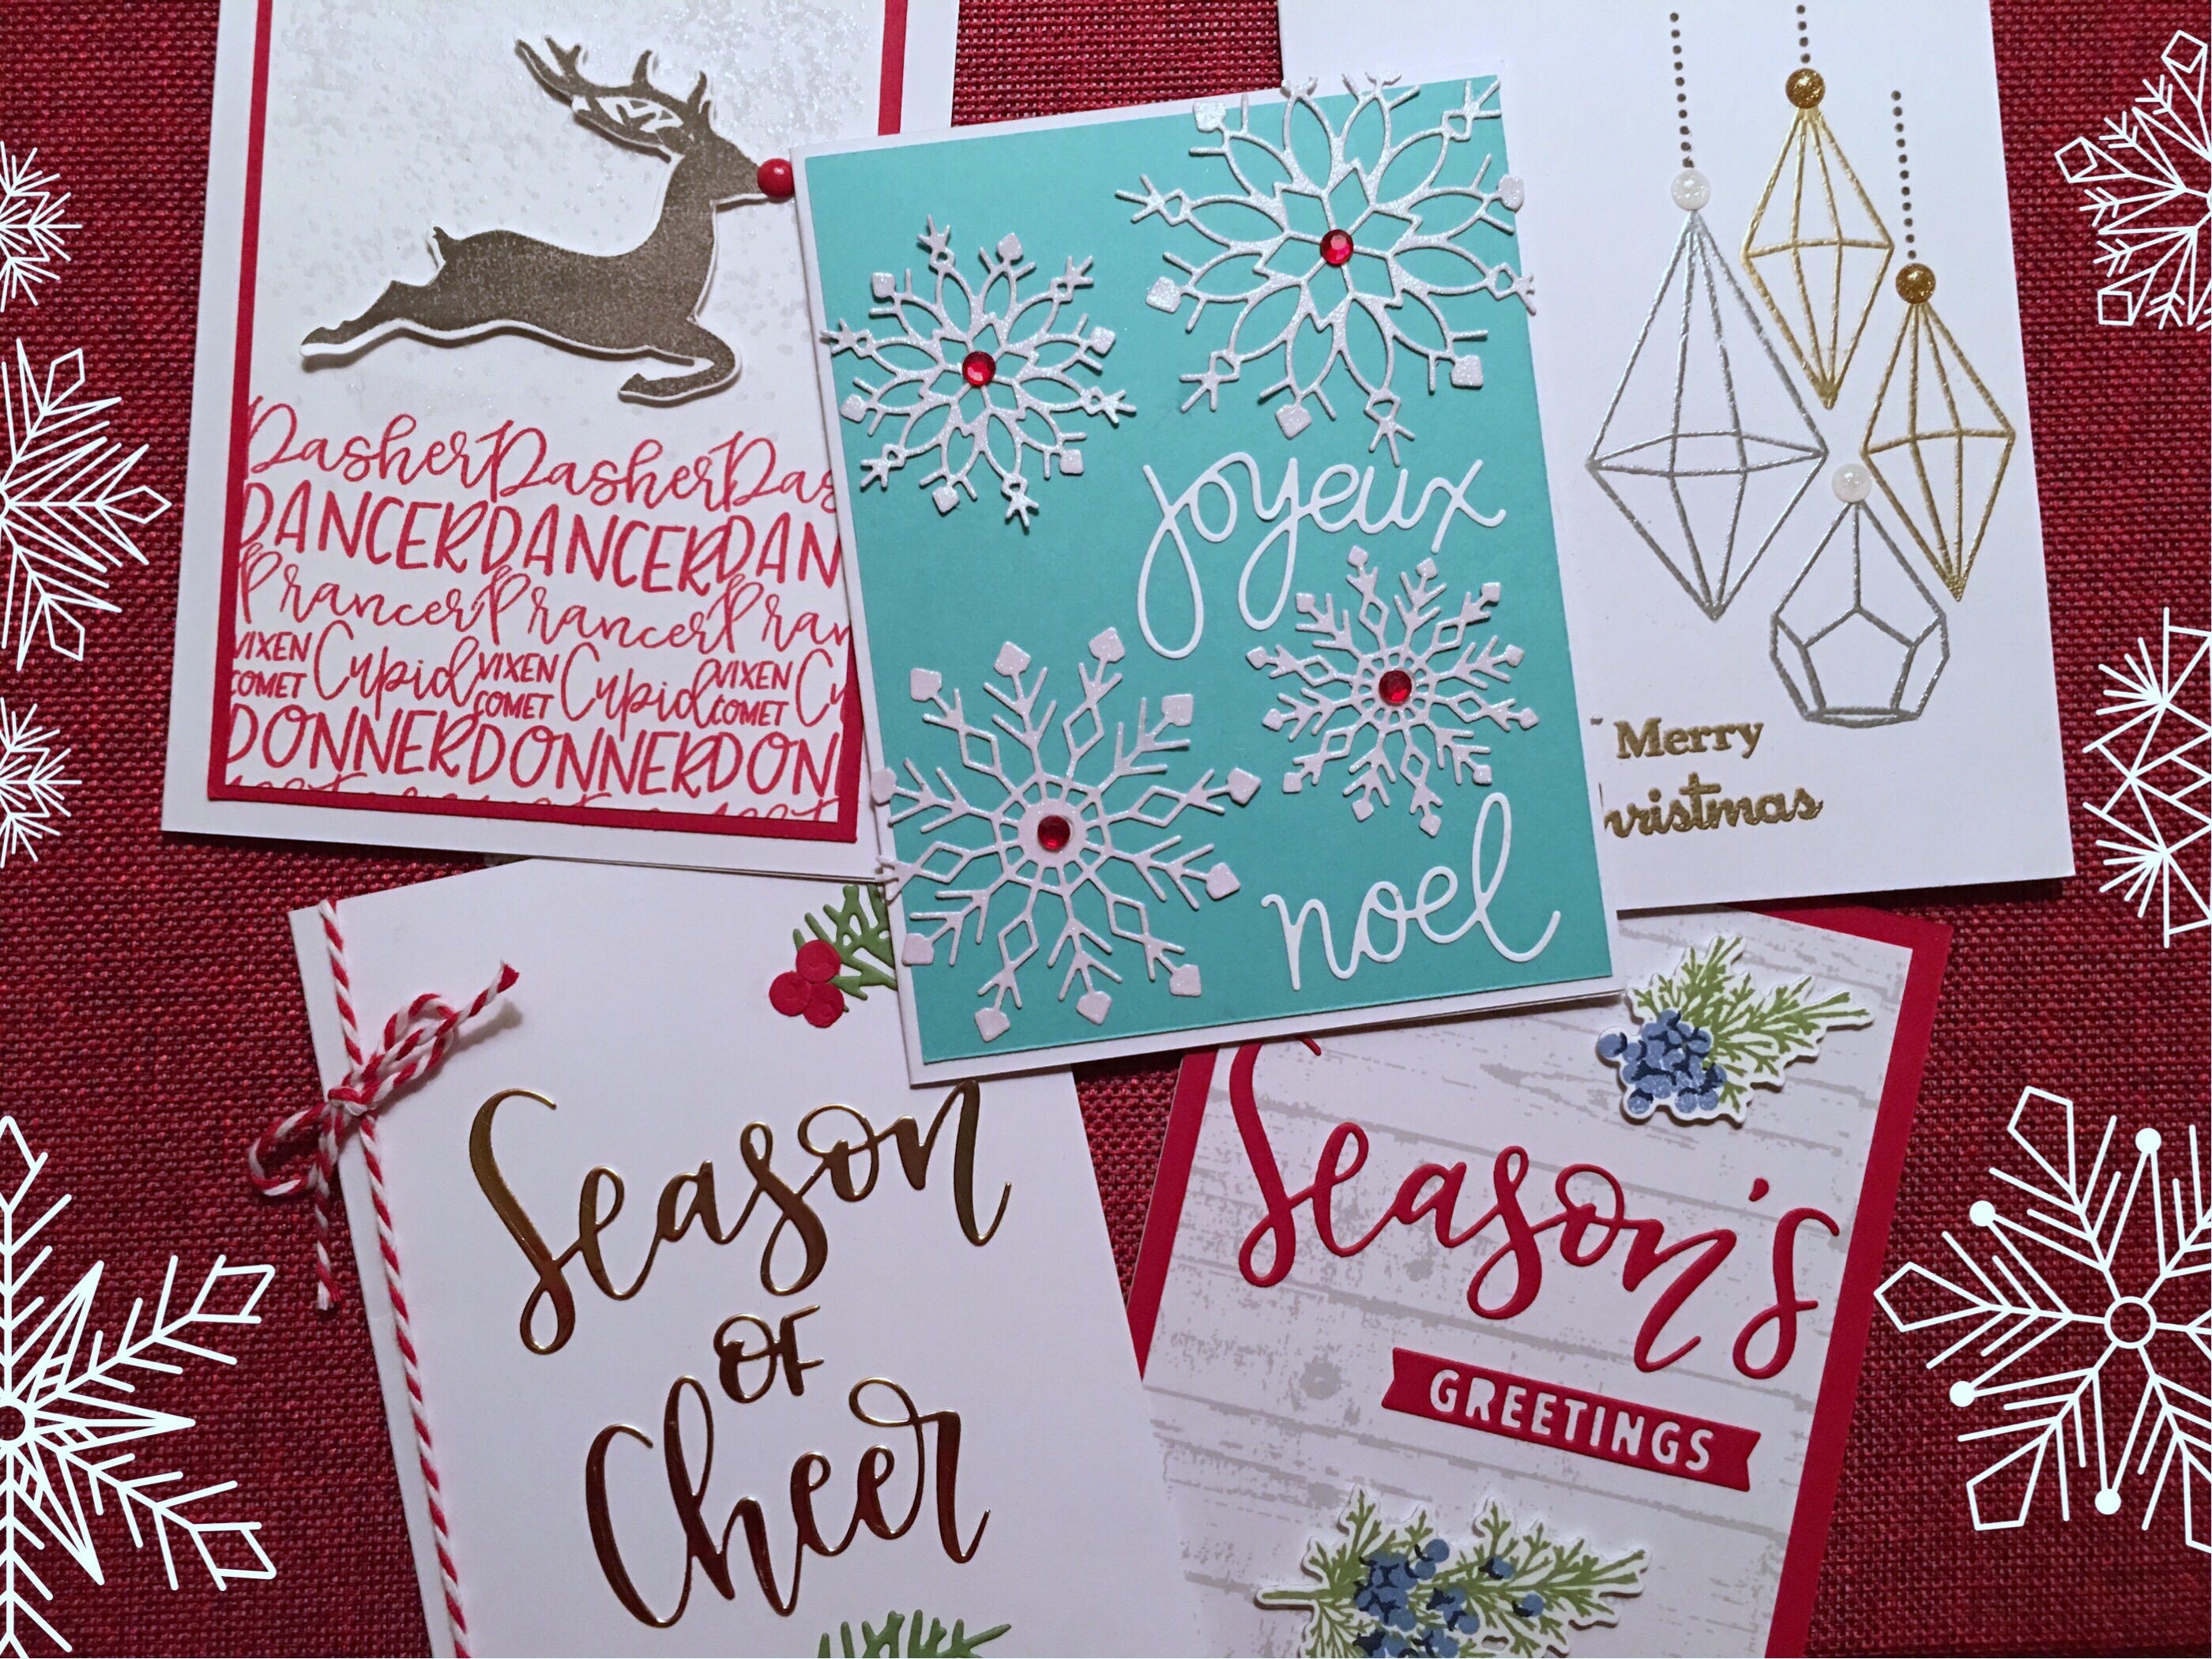
I used one of my newest stamp sets on this card, Dash Away All by Papertrey Ink. My favorite stamp in this set is the text block that names all nine reindeer. Sometime I want to stamp it on plain paper to make a repeating pattern of reindeer names and use it as wrapping paper for a small gift. It would also look great as a background for reindeer tags too. You may notice Blitzen’s and Rudolph’s names are cut off from the image stamped at the bottom of my card, which was necessary in order to leave some snowy white space for my Rudolph the Red Nosed Reindeer.

First I trimmed white cardstock to fit the card front, leaving extra room for a red cardstock mat border. I stamped the text three times off the side and bottom edges of the white cardstock panel. Next I stamped the snowy background using a Versamark ink pad, which is clear but provides a watermark effect on cardstock. It’s super wet, sticky ink that’s ideal for embossing. I added sticky embossing powder to the Versamark-stamped snowy background and heat set it with the embossing gun. Sticky embossing powder clings to the stamped image and remains sticky after it is heat set, which allowed me to sprinkle Ranger dry glitter in Clear Rock Candy on top of it for sparkly snow. I stamped the reindeer on another piece of white cardstock, and used the reindeer die to cut out the image with a die cutting machine. The reindeer was adhered with foam mounting tape to give the card a little dimension, and a red enamel dot was added for Rudolph’s nose.

Silver and Gold
On this card I used stamps, heat embossing, and enamel dots to achieve a silver and gold metallic effect with hanging crystal ornaments. The ornaments are from the Christmas Crystals stamp set by Hero Arts and the sentiment is made up of three stamps from the Avery Elle Kitsch Christmas stamp set.

I stamped the items I wanted to be silver first with the Versamark ink pad, then covered them in silver embossing powder and heat set them before stamping the images I wanted to be gold. This can be a really easy card if you don’t make any mistakes. It just takes a little planning for the design and two rounds of careful stamping and embossing. No cutting or coloring required!

White Christmas
I love to use snowflakes on cards, so I fell in love with the Silver White Winters die cutting set from Papertrey Ink. I love how detailed the snowflakes are. There are four different snowflakes in the set, and I ran them through the die cutting machine all at once. Because the pieces are so thin and intricate, I had to use my QuickStik tool to remove them. There are small holes in the metal die you can poke through from the other side with one end of the tool, and the opposite end of the tool has a sticky tip to pick up and help separate the paper snowflakes from the metal die too. Sometimes I also try to bend the metal die slightly to get the paper to separate. The most time consuming part of this card is just digging out the cut pieces from the dies and then adhering them to the card. The Quickie Glue pen works well for gluing thin pieces since it is a fine tip pen that dispenses blue-hued adhesive that dries clear. I always try to have an extra one on hand in case my glue pen dries up or runs out of glue. The pretty aqua cardstock background makes the white snowflakes pop. It’s hard to tell from the photo, but I used glittery white cardstock for the snowflakes. I added red rhinestones to the center of each snowflake to add some color contrast to the card and give it a Christmasy feel. I borrowed Wendie’s Joyeux Noel die made by Simon Says Stamp to cut the sentiment for the card. We love to share our stamp and die sets; it’s like doubling your library of sets to work with. We often consult each other before purchasing items so there is not much duplication between our craft inventories other than items we both must have!

Season of Cheer
I borrowed Wendie’s Season of Cheer die set by Concord & 9th to make this card and the next one. The set contains a bunch of mix and match sentiments that can be used to make Christmas, New Year’s, Thanksgiving, and all occasion cards. Concord & 9th products have such a clean and contemporary feel; many of their stamps are unique and unlike those offered by other paper crafting companies. I cut the sentiment from gold foiled cardstock. The sprig of greenery is an accent from the same set. There are round circles for the berries too, but since I forgot to cut these Saturday and I finished this card Sunday, I used a hole punch to make the berries. I tied baker’s twine around the card to finish it off.

Juniper Berries
This card also uses the Season of Cheer die set for the greeting. I stamped and die cut the juniper berries using Papertrey Ink’s Beautiful Berries: Winter set. The berries are made by stamping three different stamps to get the tricolor image. Color layering has become popular within the last three years or so and I love the effect it produces. It can be tricky to line up the detailed images with precision though. I usually have to do a few test runs to get the images lined up every time I get a new set. Once you’re familiar with how the images line up, it’s a much easier process. The background for the card is wood-look patterned paper. I love using patterned paper as a short-cut to add design to a project.

Have you started your Christmas shopping or Christmas craft projects? I’d love to hear what you’re working on in the comments! ‘Tis the season to be crafty!
Related Posts

Fit to be Dyed: Easter Egg Decorating Fun at Home
Decorating Easter eggs turned out to be the perfect stay-at-home Easter activity for…
07 November, 2017
A Giveaway to Celebrate Two Years of Gnome Decor!
October 5 UPDATE! We have a winner! Katie Camden won the set of three handmade…
07 November, 2017
Marilee | 7th Nov 17
Your handmade Christmas cards are just Beautiful! Such detail and original designs! My favorites are the reindeer and snowflake cards! I need to start my Christmas crafting. Hoping to get more Christmas shopping done at the St. Luke’s Craft Sale this Saturday with my friend Nancy.
Denise Breimeir | 7th Nov 17
Thank you! I am looking forward to making more Christmas cards at the Paper Source Christmas card workshop Thursday night. I need to start my Christmas ornaments and handmade gifts. The St. Luke’s bazaar is a great place to find Christmas gifts and inspiration!
Katie C. | 16th Dec 17
I am so floored by your knowledge and skills and just… wow!!!! Everything is so next level and professional! The creativity plus eye for design plus skill and know-how… You are a true artist and I really appreciate you sharing!!
Denise Breimeir | 16th Dec 17
You are too kind; thank you! I tell myself this every year, but next year I really do want to start on my Christmas crafts in January!