Stamp-a-faire Roundup: Ten Anniversary Challenge Projects

Stamp-a-faire is a free annual online crafting event hosted by Papertrey Ink, my favorite manufacturer of clear stamps, dies, and other paper crafting accessories. I’m obsessed with their products and blog, where the challenge was hosted by members of their design team August 25-27. I had never participated before, but I actually had the weekend of the challenge free this year, so I had time to watch the instructional videos, follow the challenges as they were posted, gather supplies, be inspired and create my own projects. I managed to finish six of the challenges by the deadline for prize drawings, and then I made the final four projects in September after the challenge ended. I had so much fun using new products and techniques I’d never tried before. It was a blast setting aside creative learning time! I definitely want to participate next year so I’ll block it on my calendar when the date is announced.
This year’s Stamp-a-faire theme was Anniversary Gifts in honor of the company’s 10th anniversary. Each challenge was based on an anniversary tradition and featured that year’s material. There were 20 total challenges, two per anniversary tradition, and each by a different designer. I set a goal of completing 10 of them, one per anniversary tradition. This worked out well because I could pick between two projects for each yearly tradition, based on which was my favorite, or the supplies I had available to use.
Check out Papertrey Ink’s complete details for Stamp-a-faire 2017! There is a link to each challenge at the end of their post, with videos and step by step instructions. I’ve included the project photos from the designers below.
Here are the ten challenges I picked, and my projects I came up with for each.
- 1st Anniversary Tradition: Paper

The Challenge: Create a project featuring paper scraps and vellum overlays.
1st Anniversary: Paper
By Denise BreimeirI was happy the challenge started with a quick and easy project. I have lots of paper scraps, so I used gold foiled vellum and several Papertrey Ink cardstock scraps from a color palette inspired by their Take Ten Warm Up Challenge: it’s the last color scheme shown at that link. I also used Papertrey Ink’s Ways to Say: Hello die and Cover Plate: Hexagon die.
- 2nd Anniversary Tradition: Cotton

The Challenge: Create a project featuring colored cotton.

2nd Anniversary: Cotton
By Denise BreimeirI had a bunch of fun with this challenge. I thought Stephanie’s cotton candy card was so cute. I had this vision in my head of a card featuring a cotton candy cart, then realized the flower cart dies in the Market Street kit from Papertrey Ink could be used to make a 3D version. I hand cut and folded a cotton candy tray insert, and used Stephanie’s example of how to create paper cones from squares of cardstock to make mini cones. I dyed the cotton using Stephanie’s technique, but I didn’t have pink paint or watercolor, so I mixed red and white watercolors into a glass of water. I let the cotton soak awhile to absorb as much color as possible then squeezed out the water and let it dry. I have a bunch of leftover “cotton candy” I want to use to make a card like Stephanie’s someday.
- 3rd Anniversary Tradition: Leather

The Challenge: Create a project featuring faux leather.

3rd Anniversary: Leather
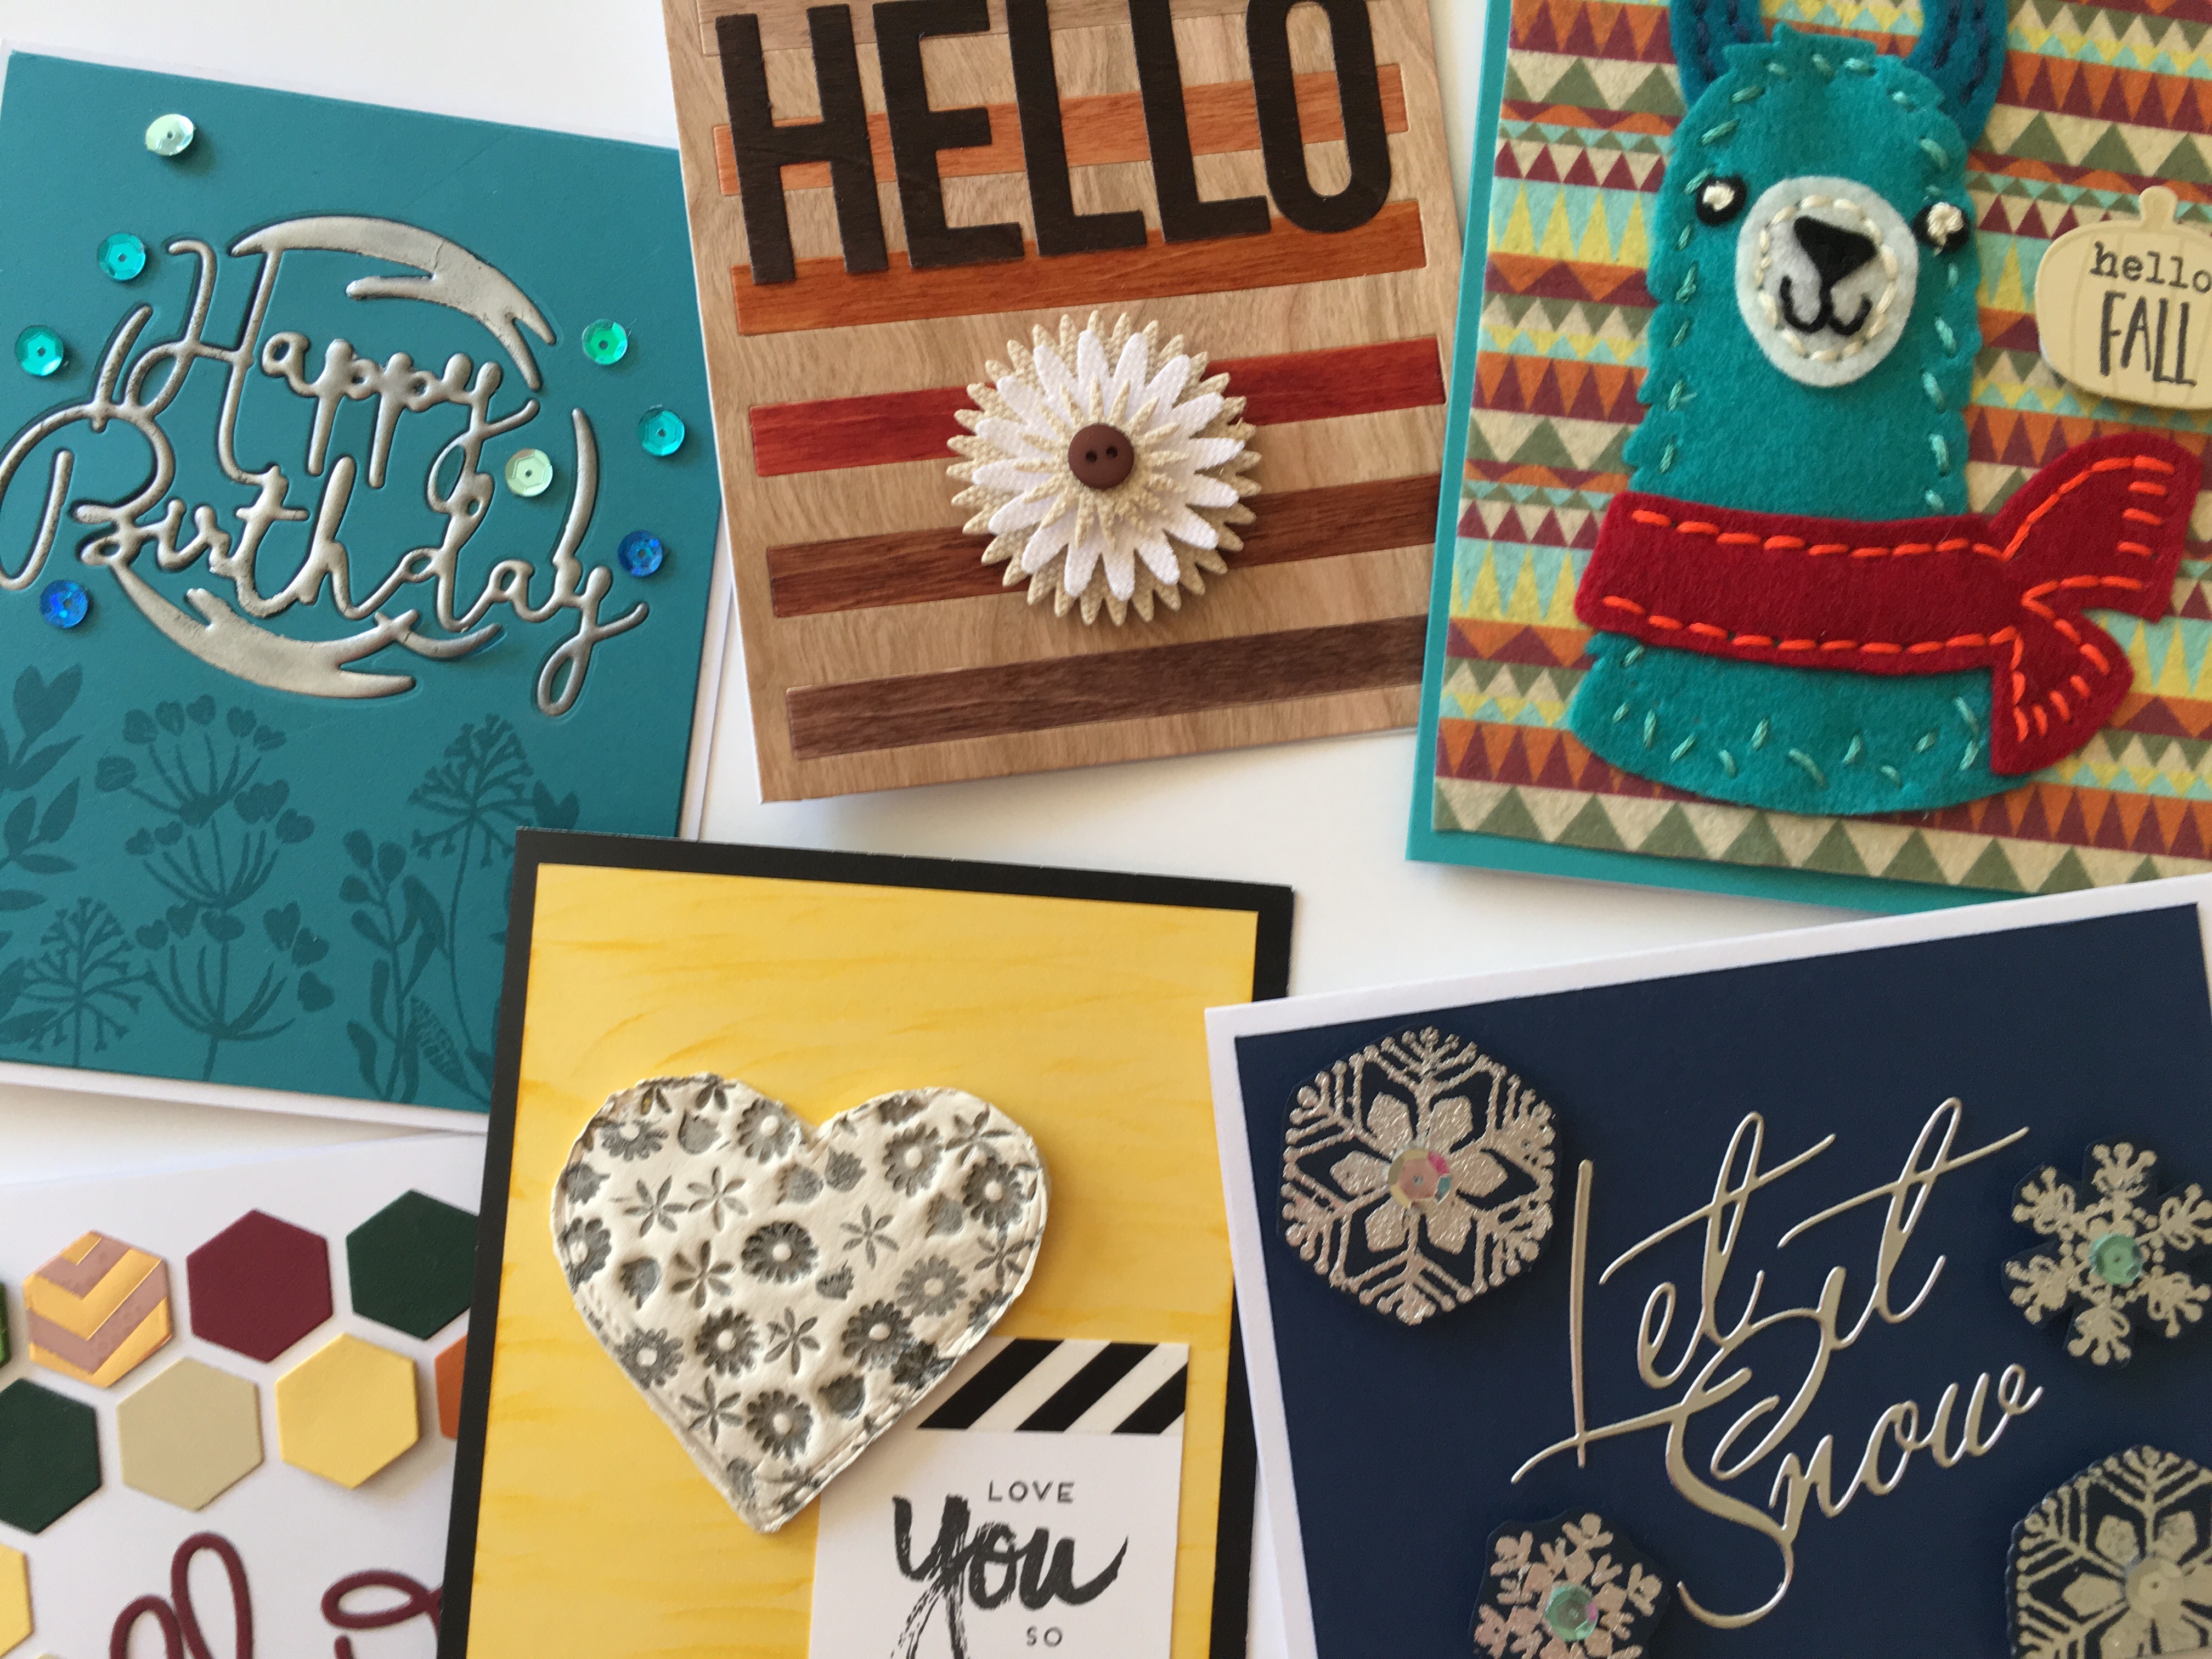
By Denise BreimeirThe faux leather in this project is made from brown cardstock sprayed with a water-glycerine mixture that is then crumpled into a ball. Then you spray, crumple, and flatten two more times. Once it dries overnight and is run through the die cut machine, it looks so much like real leather! I used Papertrey Ink’s Super Succulents stamps and dies for the designs on the faux leather tags. The tag shapes were cutting using the Minute to Make: Holiday Tags Die.
- 4th Anniversary Tradition: Linen

The Challenge: Create a project featuring stamped linen wraps.
4th Anniversary: Linen
By Denise BreimeirAmy’s project was inspired by furoshiki, a Japanese traditional wrapping cloth. I never thought there could be so many creative wrapping techniques with fabric. I want to wrap a gift in a tea towel or handkerchief after learning this neat folding technique. I used linen muslin to wrap a small box. I did the wrapping before the stamping so I could judge where to place my design. I used Papertrey Ink’s Gran’s Garden and Mini Blooms stamp sets.
- 5th Anniversary Tradition: Wood

The Challenge: Create a project featuring some kind of woodgrain inlay technique.
5th Anniversary: Wood
By Denise BreimeirThis was one of my favorite projects. I love wood, and I couldn’t believe how easy it was to create different wood “varieties” by coloring two kinds of actual wood veneer cardstock (birch and cedar) with brown Copic markers. I used Papertrey Ink’s Cover Plate: Stripes Horizontal Die and the Die-namics Big Hello from My Favorite Things. I want to make more cards like this.
- 6th Anniversary Tradition: Iron

The Challenge: Create a project featuring a metallic embossed die-cut.
6th Anniversary
By Denise BreimeirThe trick to getting this molten iron look is to heat emboss a die cut covered in Versamark ink with silver embossing powder four times to build up a thick metallic layer. The die shape I chose was a little thin and fragile to handle all that heat embossing, but I had fun with this when I got it to work. I used the Shaped Sayings: Birthday Die and Gathered Garden stamp set from Papertrey Ink.
- 7th Anniversary Tradition: Wool

The Challenge: Create a project featuring a stitched layered embellishment (felt or paper).
7th Anniversary: Wool
By Denise BreimeirI’d rather clean my bathroom than sew, so I left this project to the end. I can’t sew as you can tell by this badly stitched llama! I’m hoping his cuteness offsets the poor execution. At least the scarf looks okay since I did it last. This is my first and probably last hand-stitched card. The pumpkin stamps and die are from Papertrey Ink’s Autumn Scarecrow set.
- 8th Anniversary Tradition: Bronze

The Challenge: Create a project featuring Perfect Pearls or a similar metallic pigment powder.
8th Anniversary: Bronze
By Denise BreimeirWorking with Perfect Pearls for the first time was fun, but it definitely produces more of a subtle effect than embossing powder. I think next I would use Perfect Pearls with a pop-dotted die cut or adhesive for more oomph since the adhesive seems to take more powder than the Perfect Medium ink and produce a bolder result, as shown in Kimberly’s project featured in the top photo. I used the Swan’sational stamp set from Papertrey Ink.
- 9th Anniversary Tradition: Pottery

The Challenge: Create a project featuring a clay/paperclay embellishment.
9th Anniversary: Pottery
By Denise BreimeirThis was my first time working with Paperclay. It definitely feels like clay when you’re working with it, but after drying overnight, it feels more like thick paper. I used a heart die to trace the shape. I used the same mini flower stamps from Papertrey Ink’s Sunshine & Rainbows kit that Lexi used in her project. The harvest gold Papertrey Ink cardstock was brushed with a Bright Buttercup inkpad to give a nice variation in color.
- 10th Anniversary Tradition: Tin & Aluminum

The Challenge: Create a project featuring gilding flakes.
10th Anniversary: Tin & Aluminum
By Denise BreimeirNuvo gilding flakes are fun in theory but a nightmare to clean up. They are as light as air and fly everywhere. They’re still stuck to my keyboard right now. Even working with them in a shallow cardboard box can’t contain the madness. I had to vacuum afterwards because I was worried my cat Flurry might eat them. Especially if she heard they were being used to create snowflakes! The Let it Snow die is from Papertrey Ink’s Christmas Cheer and the snowflake stamps are from a retired set called Snowflake Flurry from My Favorite Things.
Well, that’s it! If you made it to the end, you deserve a cookie. I loved this challenge and learned so many new techniques. Are there any shown here that you have tried or want to try? Which year’s theme is your favorite? Tell me in the comments and happy crafting!
Related
Related Posts
Fit to be Dyed: Easter Egg Decorating Fun at Home
Decorating Easter eggs turned out to be the perfect stay-at-home Easter activity for…
Related
A Giveaway to Celebrate Two Years of Gnome Decor!
October 5 UPDATE! We have a winner! Katie Camden won the set of three handmade…


Wendie | 30th Sep 17
I love all of your cards!!! Yay for crafty learning! I’m so glad you’re blogging!
Denise Breimeir | 1st Oct 17
Thank you, Wendie! I think I’ve been bit by the challenge bug as I want to do more of them!
Marilee | 30th Sep 17
I LOVE all of them. My two favorites are the adorable llama and the linen floral embroidery, but really all of them are unique! Thanks for sharing!
Denise Breimeir | 1st Oct 17
Thank you! This was a fun challenge! Those two turned out to be among my favorites too!
Jessica | 30th Sep 17
These are all absolutely gorgeous! I love, love, love the wood look. Keep at the handstitching– it’s time consuming for sure, but such a neat look!
Denise Breimeir | 1st Oct 17
Thank you so much, Jessica! I am going to make more of the wood cards. They are quick and fun!